Today I got to mix two of my favorite things: organizing and crafting. My little sister is halfway through her senior year of high school, and she would really like a place to have friends over, so we are re-doing my basement over thanksgiving. My sister is quite the little task master, and today I got assigned organizing the "junk/toys/crafts closet. Much to my joy (and her dismay) I found four full boxes of arts and crafts with everything I could ever want in them. I then proceeded to spend most of the day arranging them into different categories and putting them all into a MUCH LARGER new craft box. I think it was a totally necessary step in organizing the closet, but I'm not sure my sister agreed.
Anyways, I have christmas lights hanging in my room instead of curtains, and I decided to make stars to hang from them to add decoration to my room. (For all those of you worried about my sister and the cleaning, don't worry I finished helping her before I started crafting.) So without further ado (I have always wanted to say that) here is how I made the stars. Well actually only one, but you get the point.

Supplies that you will need for this project:
A large cereal box (per star, unless you make small stars)
Hot glue
Spray paint (white or black will work)
Mod podge (or make your own with Elmer's glue and water)
Ten scrap book papers with fun colors or patterns on them.
Black acrylic paint
Step 1. Print a picture of a five point star. I used Microsoft Word's shapes and chose the star shape and then stretched it so it took up as much of the sheet of paper as it could.
Step 2. Cut out the paper star and use it as a stencil to trace onto the cardboard. Trace two stars and cut them out. NOTE: on the second star I cut out little tabs to help when I glue the stars together later.
Step 3. Using a ruler and a pencil draw lines (with pressure added) from the tips of the star through the middle to the point on the bottom. The point of this is not to draw lines, but to make indentations that will help you fold the star later. When I did this I used a mechanical pencil that didn't have any lead out so it would dent the cardboard without leaving pencil lines. I did it on the white paper below so that you can see how it would look. The blue lines are the lines you are creating.
Step 4. Fold the star on the lines you etched. See the picture below to see where to fold up and fold down.
Step 5. Glue it together. Good luck, this was the hard part for me. Also it doesn't really matter if you get extra glue on the sides but make sure it gets smoothed out. If the stars don't fit together perfectly, line them up as best as you can and then use a scissors to cut off the extra.
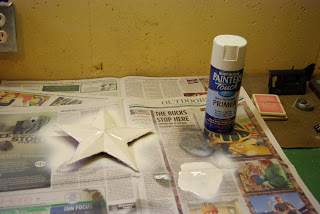
Step 6. Spray paint both sides of the star. I chose to use white, but I think black could look really cool too. I also would love to try it with chalk paint so you could write messages on the back. Let it dry for an hour or so based on your paint. I let it dry overnight because I ran out of time and it was getting late.
Step 7. Cut out a template from the white star that you used to trace the cardboard. Use this to trace 5 triangles onto scrapbook paper of your choosing. Then flip the stencil over and do the same thing. This will give you all the patterns you need to cover the star.

Step 8. Once you have all the pieces cut out you need to glue them on. I painted my mod podge onto the surface of the star, put my patterned piece on top of the glue, and then put a coat of mod podge on top. Be very careful not to use too much glue when you do this, because you don't want soggy paper.
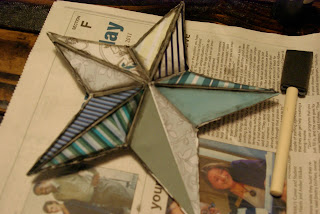
This is what it looks like with all the pieces glued on. If you want you can stop here.
I decided not to be finished yet. If you decided to add more to your star, you can make it look weathered by following the final steps.
Step 8. Use a little bit of black paint and a sponge brush or normal paint brush to add the black paint to the edges. Blend it into the paper. Again be careful to not get the paper too wet. It will peel and fall off.
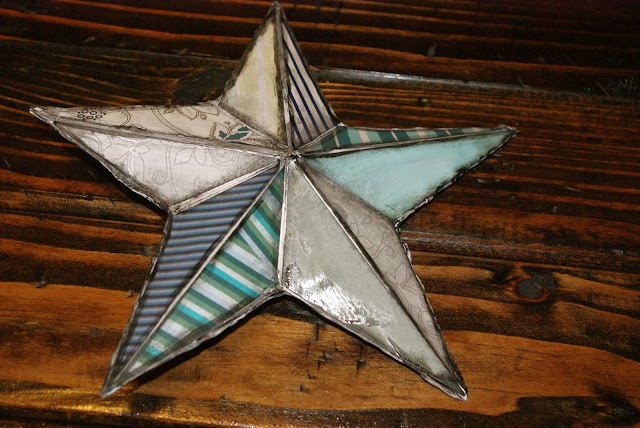
This is what my finished star looks like. I think it turned out pretty well. I love how it looks hanging on the curtain hooks. If you decide that you want your star to hang, grab a christmas ornament hook and punch it through the back of the star.


No comments:
Post a Comment